
Shrubs
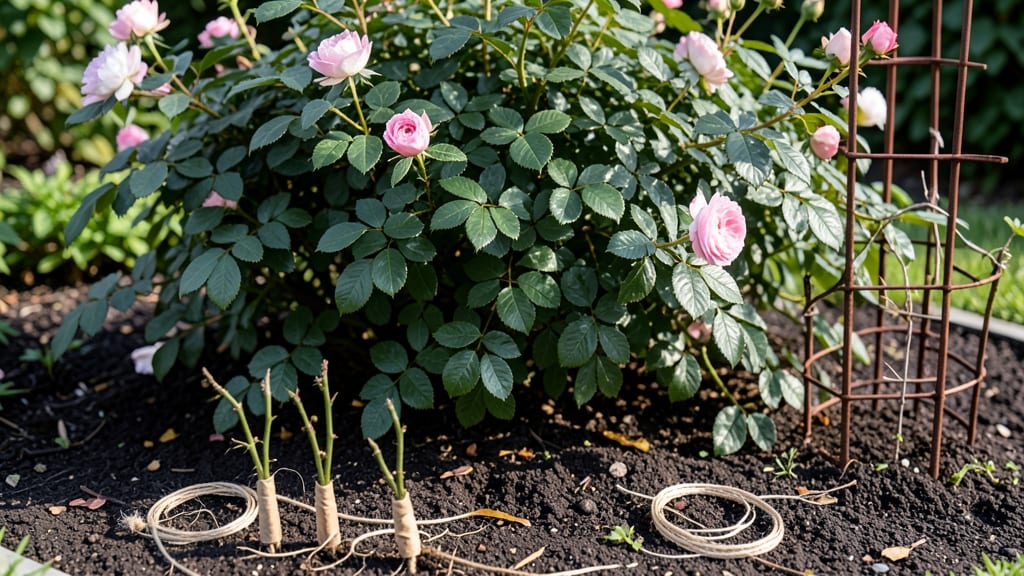
Building a DIY rose archway transforms any garden into a storybook entrance. ✨ The first time I saw one blooming with deep pink roses, I knew I had to try—my backyard needed that same old-world charm without the price tag.
This project is simpler than it looks, with just three core steps that take a weekend and cost less than buying a pre-made structure.
You'll need basic materials: a sturdy arch frame (I used cedar for its natural rot resistance), landscape fabric to protect the wood, and climbing roses that love your climate.
The real magic happens when you choose roses that thrive in your zone—think Knock Out roses for low-maintenance blooms or Climbing Tea Roses for fragrant, show-stopping flowers. Most garden centers carry bare-root roses in early spring, perfect for planting after the arch is built.
By the time summer arrives, your archway will be bursting with color, creating a fragrant tunnel that invites you to explore. The best part? It grows more beautiful each year as the roses establish themselves.
My arch now serves as both a garden feature and a trellis for morning glories, doubling the seasonal interest.
Works for any garden size—whether you're framing a path, marking a seating area, or adding drama to a blank wall. The key is patience: roses need time to climb, but the wait is worth every blooming moment. Ready to get started?
📚 In This Guide
- What you need
- Instructions
- Tips and common mistakes
- Wrapping up and next steps
What you need
- ● Roses: 12–15 healthy, disease-resistant climbing roses (e.g., 'Blaze,' 'New Dawn,' or 'Zephirine Drouhin'). Choose roses with long canes for better draping.
- ● Arch Frame: A pre-made wooden or metal archway (8–12 ft wide, adjustable height) or DIY materials like 4x4 pressure-treated lumber (cut to size) and galvanized wire for structure.
- ● Potting Soil: 2–3 bags of high-quality, well-draining miracle-gro potting mix or garden soil amended with compost.
- ● Fertilizer: Slow-release rose-specific fertilizer (e.g., Miracle-Gro Rose Food) or organic options like fish emulsion.
- ● Mulch: Pine bark fines or shredded mulch (2–3 bags) to retain moisture and suppress weeds.
- ● Pruning shears or bypass pruners (for trimming roses and shaping canes).
- ● Garden gloves (to protect your hands from thorns!).
- ● Measuring tape and level (to ensure your arch is straight and even).
- ● Post-hole digger or shovel (for securing the arch frame if DIY-ing).
- ● Staple gun or landscape fabric staples (to attach wire or canes to the arch).
- ● Watering can or hose with a gentle spray nozzle.
- ● Epsom salt (1 cup dissolved in water) for a magnesium boost to roses.
- ● Decorative lights or solar-powered string lights for a magical evening glow.
- ● Paint or stain (for weatherproofing your wooden arch).
- ● Trellis wire or jute twine to weave canes together for extra support.
Step-by-step instructions for building a DIY rose archway
Here’s how to create that dreamy garden entrance—no advanced skills needed.
🪴 Step 1: Choose and Assemble Your Arch Frame
Start with a sturdy arch frame, either pre-made from metal or wood, or build one using 4-foot long PVC pipes bent into an arch shape. Secure the base with concrete footings or heavy-duty stakes driven 12 inches deep into the ground. Space the supports 3-4 feet apart for stability. I like to use a level to ensure the arch sits perfectly straight—no wobbly gateways here!
For extra durability, reinforce the joints with metal brackets or zip ties. If you’re using a metal frame, skip the stakes and bury the base directly in the soil. The key is making sure it won’t shift when you start training roses up it later. A little effort now saves headaches down the road.
🌱 Step 2: Attach Trellis or Wire Mesh for Climbing Roses
Wrap the arch with garden wire mesh or attach a pre-made trellis, leaving gaps of about 4-6 inches between wires. This gives rose canes plenty of room to grip and grow. Secure the mesh tightly with zip ties or staples—you don’t want it sagging under the weight of blooms. I like to overlap the ends by 6 inches and tuck them under the arch’s base for a clean finish.
If you’re using a metal frame, you can skip the mesh and rely on the frame’s natural structure, but roses need something to cling to. Think of it like a jungle gym for your plants—more surface area means more climbing power. This is also the perfect time to add a drip irrigation line if you want low-maintenance watering later.
☀️ Step 3: Plant and Train Climbing Roses
Dig holes for your rose bushes twice as wide as the root ball and 6-8 inches deep, spacing them 3-4 feet apart at the base of the arch. Plant them at the same depth they were in their nursery pots—burying the graft union too deep can weaken the plant. Water deeply right after planting to settle the soil and remove any air pockets.
As the roses grow, gently weave the canes through the trellis or mesh, tying them loosely with soft plant ties. Don’t pull too tight—you’re guiding, not strangling. Prune back any long stems to encourage bushier growth at the base. Within a few months, you’ll see those first tendrils reaching for the top. Patience is key here; roses take time, but the payoff is worth it.
💧 Step 4: Maintain for Long-Lasting Blooms
Water your roses at the base deeply 2-3 times per week, especially during the first year. Mulch with 2-3 inches of organic mulch to retain moisture and keep roots cool. Fertilize every 4-6 weeks with a balanced rose food during the growing season. Prune spent blooms regularly to encourage more flowers—this is called deadheading, and it keeps your arch looking lush all season.
Watch for pests like aphids or Japanese beetles. A strong spray of water or neem oil usually does the trick. If you notice leaves yellowing, it might be a sign of overwatering or nutrient deficiency. Adjust accordingly, and don’t forget to prune in late winter to shape the arch and remove dead wood. With a little care, your rose archway will be the star of your garden for years.
Tips & tricks for perfect DIY rose arches
Between us, these small details make all the difference between a sturdy, showstopping arch and one that sags under the weight of blooms.
Frame Stability is Non-Negotiable: When securing your 4-foot PVC pipes or metal frame, I can't stress enough how critical that 12-inch deep stake placement is. I've seen arches wobble after just one windy day because the stakes weren't driven deep enough. For extra insurance, especially in windy areas, add diagonal cross-bracing between the supports. This creates a triangle shape that's inherently stronger than square frames.
Mesh Attachment Secrets: That 6-inch overlap when tucking the garden wire mesh ends under the arch base is more important than it seems. I learned this the hard way when my first arch's mesh pulled loose after a rainstorm. Use heavy-duty staples or zip ties every 12 inches along the overlap for maximum hold. For metal frames, consider wrapping the entire structure with chicken wire first - it gives roses more surface area to cling to and creates a more natural look.
Planting Depth Matters: The instructions mention planting at the same depth as the nursery pot, but here's what nobody tells you - check for that graft union (the bump near the base where the rose was attached to its rootstock). This should be about 2-3 inches above the soil line. Burying it too deep can cause the plant to produce suckers (undesirable shoots) while keeping it too high can weaken the plant. A quick visual check with a ruler after planting saves future headaches.
Watering Wisdom: Those 2-3 deep waterings per week are perfect, but timing matters too. Water in the morning so the foliage has all day to dry - wet leaves at night invite fungal diseases. I also recommend installing a soaker hose at the base of your arch before planting. It delivers water directly to the roots without wetting the leaves, and you can set it on a timer for completely hands-off maintenance.
Pro Tips for Diy Rose Archway
- Between us, these small details make all the difference between a sturdy, showstopping arch and one that sags under the weight of blooms.
- Frame Stability is Non-Negotiable: When securing your 4-foot PVC pipes or metal frame, I can't stress enough how critical that 12-inch deep stake placement is.
- Mesh Attachment Secrets: That 6-inch overlap when tucking the garden wire mesh ends under the arch base is more important than it seems.
Frequently asked questions
Got questions about crafting your dream DIY rose archway?
Here are answers to the most common queries to help you create a stunning garden gateway with ease!
How long does it take to build a rose archway?
A basic DIY rose archway can take 4–8 hours to complete, depending on your skill level and whether you’re using pre-cut materials. If you’re starting from scratch (like building the frame), plan for a full day. Pro tip: Prep the frame first—this step alone can save you hours of frustration later!
Can I use other flowers instead of roses?
While roses are classic, try clematis, jasmine, or climbing hydrangeas for a lush, fragrant alternative. Just ensure the plant is vigorous and fast-growing to fill the arch quickly. For low-maintenance options, consider star jasmine—it’s drought-tolerant and blooms year-round in warm climates!
What’s the best time of year to plant a rose archway?
Plant your roses in early spring or fall when temperatures are mild and rain is frequent. Avoid extreme heat or frost, which can stress young plants. If you’re in a warm climate, late winter (before buds swell) is ideal. Give them 6–12 months to establish before expecting full coverage!
How do I keep pests away from my rose archway?
Pests like aphids and spider mites love roses! Spray plants with neem oil or insecticidal soap weekly during growing season. Encourage ladybugs and lacewings (natural predators) by planting marigolds or dill nearby. Prune regularly to improve airflow, reducing hiding spots for pests.
Do I need a trellis or can I skip it?
While you can skip a trellis, it’s highly recommended for structure and support. A sturdy frame (like PVC pipes or wooden arches) ensures roses grow upward instead of sprawling. If you’re short on time, use metal arch kits—they’re pre-assembled and budget-friendly!
How often should I water a new rose archway?
Water deeply 2–3 times per week for the first year, aiming for 1–2 inches of water per week. New plants need consistent moisture to root. Use drip irrigation or soaker hoses to keep soil evenly damp without wetting leaves (which promotes disease). Mulch around the base to retain moisture!
Wrapping up and next steps
Creating your own DIY rose archway is a rewarding project that blends creativity with nature’s beauty! With just a few tools, some sturdy materials, and a little patience, you’ve turned an ordinary garden space into a romantic, Instagram-worthy gateway. 🌹✨
Now that you’re inspired, why not take it a step further? Plant climbing roses around your archway for a living, fragrant masterpiece—or add twinkling lights for an enchanting evening glow. Your garden’s new centerpiece is just the beginning!