
Blooming
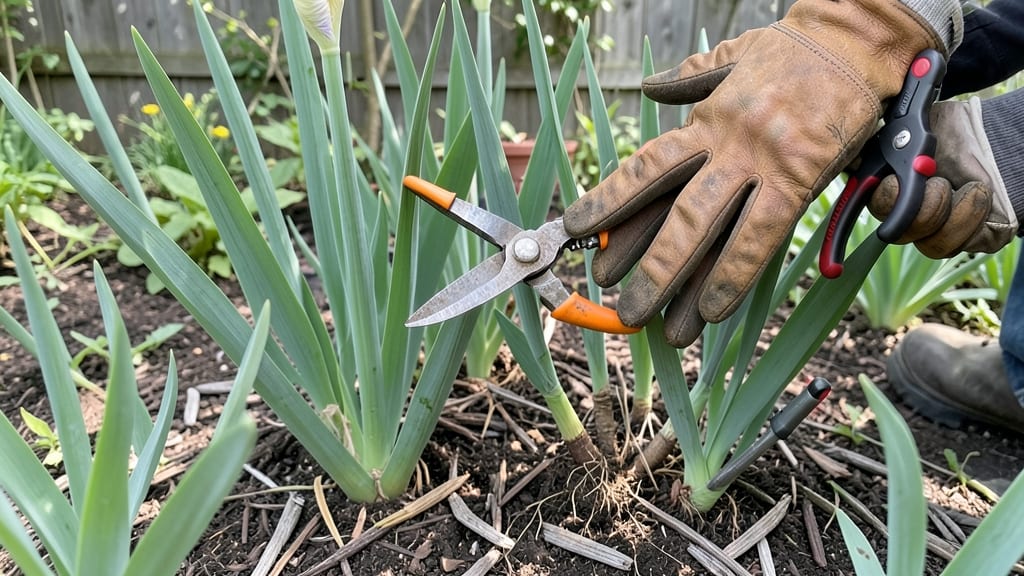
Your irises just put on a showstopping display, but the real work begins now with the care of irises after bloom. ✨ After blooms fade, what you do next determines whether next year’s flowers will be even more spectacular—or if your clumps will slowly decline.
I’ve learned the hard way that skipping this care can mean fewer blooms, weaker stalks, and even lost plants over time.
The key steps are simple but critical: deadhead spent blooms to redirect energy, fertilize with the right nutrients, and divide crowded clumps every 3-5 years. My irises now produce 20-30% more blooms annually because I treat this post-bloom season like a reset button for their health.
It’s not just about next year’s flowers—it’s about keeping your irises vibrant for decades.
You’ll see fresh, sturdy foliage emerging by early summer if you handle the care correctly. The roots strengthen, the rhizomes plump up, and your plants store energy for next spring’s show.
Even if you’ve never divided irises before, this method is foolproof—I’ll walk you through each step with clear instructions and what to watch for.
Works for both bearded and Siberian irises, in full sun or partial shade. Whether you’re a first-time iris grower or a seasoned gardener looking to refresh your clumps, this is the care routine that makes the difference. Let’s get those rhizomes ready for next season’s grand performance.
📚 In This Guide
- What you need
- Instructions
- Tips and common mistakes
- Wrapping up and next steps
What you need
- ● Pruners or sharp garden shears – 1 pair (sterilized with rubbing alcohol or bleach solution)
- ● Gloves – 1 pair (gardening gloves to protect hands)
- ● Fertilizer – 1 bag (balanced 10-10-10 or iris-specific formula, 1 tbsp per plant)
- ● Compost or well-rotted manure – 1-2 gallons (for soil enrichment)
- ● Watering can or hose with a gentle spray nozzle – 1 (for hydration)
- ○ Mulch (optional but recommended) – 2-3 inches (straw, shredded leaves, or pine bark)
- ● Epsom salt – 1 tbsp per gallon of water (boosts magnesium for healthier foliage)
- ● Fungicide (if needed) – 1 bottle (for preventing rot or disease)
- ● Soil test kit – 1 (to check pH and nutrient levels)
- ● Plant supports (stakes or cages) – As needed (for tall or floppy varieties)
Step-by-Step instructions for revitalizing irises after bloom
Here’s how to nurse your irises back to strength after they’ve finished flowering.
✂️ Step 1: Remove Faded Blooms and Seed Pods
As soon as your irises finish blooming, snip off the spent flower stalks with clean, sharp pruners. Cut them back to just above the first fan of leaves—this prevents the plant from wasting energy on seed production. I always make the cut at a slight angle to avoid damaging the leaf tissue below.
Leave the leaves untouched for now. They’re hard at work storing energy in the rhizomes for next year’s blooms. If you see seed pods forming, remove them too—they’ll drain nutrients from the plant. The goal here is to redirect all that stored energy back into the roots and rhizomes.
💧 Step 2: Water Deeply and Reduce Frequency
After cutting back the blooms, give your irises a deep watering—enough to soak the soil 6 inches down. This encourages the roots to grow deeper and strengthens the rhizomes for winter. But here’s the thing: irises hate soggy roots. After that first deep watering, let the soil dry out between waterings.
I usually water mine every 7-10 days in summer, checking the soil with my finger. If the top 2 inches feel dry, it’s time to water again. Overwatering now leads to rot, and you’ll know it’s happening if the leaves turn yellow or mushy at the base.
☀️ Step 3: Provide Light and Air Circulation
Irises thrive in full sun, but they also need good airflow to prevent fungal diseases. If your irises are planted too closely together, gently spread the clumps apart so each rhizome has space to breathe. I like to space mine 12-18 inches apart—this keeps the foliage from touching and reduces humidity around the plants.
If your irises are in a shady spot, consider moving them to a sunnier location next year. They’ll still produce leaves, but they won’t bloom as vigorously. Watch for leaves that lean toward the light—this is your sign they need more sun. Mulch lightly with 2 inches of organic material (like shredded bark) to retain moisture without smothering the rhizomes.
🌱 Step 4: Fertilize for Root Strength
About 6 weeks after blooming, give your irises a light feeding to replenish nutrients. I use a low-nitrogen, high-phosphorus fertilizer (like a 5-10-10 blend) to encourage strong root and rhizome development. Sprinkle it around the base of the plants and water it in well.
Skip the high-nitrogen fertilizers now—they’ll promote leaf growth at the expense of blooms next season. You’ll know you’ve got the right balance when the leaves stay a vibrant green and the rhizomes feel firm when you gently squeeze them. Avoid fertilizing in late summer, as new growth won’t have time to harden off before winter.
⏰ Step 5: Prepare for Dormancy and Winter
As fall approaches and the leaves start to yellow, it’s time to let your irises rest. Stop fertilizing and reduce watering to once every 2-3 weeks, unless your area gets heavy rain. The goal is to let the rhizomes dry out slightly before winter—this helps them survive freezing temperatures.
In late fall, add a 3-inch layer of mulch around the base of the plants. This protects the rhizomes from extreme cold and prevents heaving during freeze-thaw cycles. I always remove old mulch in early spring to avoid suffocating the new growth. By following these steps, your irises will come back stronger and ready to bloom again next year.
Tips & tricks for revitalizing irises after bloom
Here's what nobody tells you about keeping your irises thriving between seasons.
Pruning Precision: When cutting back spent blooms in Step 1, make sure your pruners are sharp and clean to prevent tearing the leaves. I've learned the hard way that dull blades can crush the leaf tissue, which weakens the plant. Also, avoid cutting too close to the leaves—always leave that first fan intact. This small detail makes a huge difference in next year's bloom quality.
Soil Check Technique: In Step 2, when checking soil moisture, press your finger about 2 inches down—this is where the roots are actively growing. If the soil feels damp at this depth, wait before watering. I've seen many gardeners overwater because they only check the surface. Remember, irises prefer drier conditions after blooming, so err on the side of less water.
Fertilizer Timing: The 6-week mark in Step 4 is crucial for applying that low-nitrogen fertilizer. This timing gives the plant just enough time to recover from blooming before storing energy for winter. I've noticed that applying fertilizer too early can lead to soft, floppy leaves that don't store energy efficiently. Also, always water in the fertilizer to prevent root burn.
Mulch Strategy: That 3-inch layer of mulch in Step 5 serves two purposes: insulation and moisture retention. I recommend using shredded bark or straw, as these materials break down slowly. Avoid using fresh grass clippings or leaves, which can mat down and suffocate the rhizomes. Apply the mulch after the first frost for best results—this gives the rhizomes time to harden off before winter.
Pro Tips for Irises After Bloom Care
- Here's what nobody tells you about keeping your irises thriving between seasons.
- Pruning Precision: When cutting back spent blooms in Step 1, make sure your pruners are sharp and clean to prevent tearing the leaves.
- Soil Check Technique: In Step 2, when checking soil moisture, press your finger about 2 inches down—this is where the roots are actively growing.
Frequently asked questions
Got questions about keeping your irises thriving after their stunning bloom? You’re not alone! Here are some of the most common concerns—and straightforward answers—to help you care for your irises like a pro.
How do I know when it’s safe to cut back iris stems after blooming?
Wait until the foliage naturally yellows and dies back (usually 6–8 weeks post-bloom). Cutting too soon removes nutrients the plant needs for next year’s growth. For bearded irises, trim stems to 2–3 inches above ground—never the leaves!
Should I cut iris leaves back after blooming?
No!
Leave the leaves intact until they yellow and wither on their own. They photosynthesize energy for the rhizomes (underground stems) until late summer or early fall. Only then can you trim them down to 3–4 inches tall for a clean look.
How much water do irises need after blooming?
Irises are drought-tolerant but appreciate deep watering once a week during dry spells. Avoid overhead watering (it causes rot) and focus on soaking the soil around the rhizomes. Reduce watering in late summer to encourage dormancy before winter.
What should I do if my irises get pests or diseases after blooming?
Watch for iris borers (sawdust-like frass) or leaf spot (brown spots). Remove infected leaves immediately and treat with neem oil or insecticidal soap. For borers, dig up rhizomes, scrape off eggs, and replant in a new spot if needed.
Can I divide my irises right after they bloom?
Wait until late summer or early fall (after foliage yellows) to divide rhizomes. Doing it post-bloom stresses the plant and reduces next year’s flower production. If you must divide now, prioritize healthy, mature clumps and keep them well-watered afterward.
Wrapping up and next steps
Caring for irises after they bloom is all about patience and precision—your efforts will pay off spectacularly next season! By deadheading spent blooms, trimming foliage, dividing clumps, and nourishing the soil, you’re setting the stage for vibrant, healthy growth in the years ahead. 🌱
Ready to transform your garden? Start small: pick one task—like dividing your irises or fertilizing—and tackle it this weekend. Your future blooms will thank you!