
Blooming
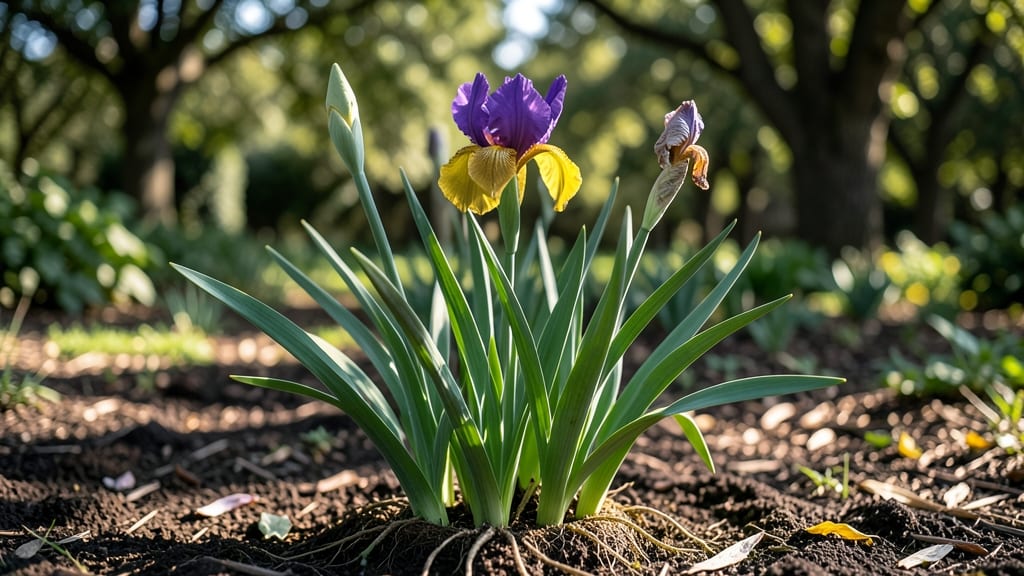
The moment your iris buds swell with promise, you're witnessing nature's heat-triggered masterpiece in the iris bloom stages. 🌸 These stages—from tight green knobs to fading petals—unfold like a carefully choreographed dance, each phase revealing the plant's inner workings.
Understanding them transforms your care from guesswork to precision, ensuring blooms that stand out in your garden. The first bud formation stage lasts about 2-3 weeks as the stem elongates and the bud tightens into a compact shape.
Healthy buds feel firm, not mushy, and their color shifts from green to a hint of purple or blue. This is when proper watering—1 inch per week—prevents the buds from splitting or rotting before they even open.
When buds begin to open, petals unfurl like delicate paper, revealing the signature iris shape. This full bloom stage lasts 3-5 days at its peak, when the flowers face the sun and their fragrance—sweet, honey-like—fills the air.
That's when you'll want to deadhead spent blooms to encourage a second flush later in the season. After blooming, the fading stage signals it's time to trim stems 2 inches above ground to redirect energy to next year's flowers.
The post-bloom care here determines whether your irises return with vigor or struggle. Feed them with low-nitrogen fertilizer in early fall to build roots for next spring's show.
📚 In This Guide
- What you need
- Instructions
- Tips and common mistakes
- Wrapping up and next steps
What you need
- ● Iris bulbs or rhizomes: Choose healthy, dormant rhizomes (preferably Iris germanica or Iris xiphium for heat-sensitive varieties). Aim for 3–5 rhizomes per plant for optimal blooms.
- ● Well-draining soil: Mix 1 part garden soil with 1 part perlite/sand (ratio: 50/50) to prevent rot. pH 6.0–7.0 is ideal.
- ● Sunlight access: A full-sun location (6+ hours/day) with afternoon shade in hot climates (zones 5–9).
- ● Watering can or hose: With a gentle spray nozzle to avoid damaging buds.
- ● Pruning shears: Sharp, sterilized (70% isopropyl alcohol wipe) for trimming spent blooms.
- ○ Digital thermometer/hygrometer: Monitor soil temps (60–75°F for budding; 80–90°F for blooming). Optional but highly recommended!
- ● Garden journal/notebook: Sketch bloom stages daily (use a magnifying glass for close-ups).
- ● Stakes or labels: Mark each rhizome with waterproof tags to track individual progress.
- ● Wait until late winter/early spring (after last frost) to plant or transplant rhizomes.
- ● Ensure no standing water—irises hate soggy roots! Elevate beds if needed.
- ● Apply a balanced fertilizer (10-10-10) at planting (follow label rates). No high-nitrogen feeds during bloom!
Understanding the heat-triggered iris bloom cycle
Here's how to recognize and encourage each stage of your iris's dramatic transformation.
🌱 Step 1: Identify the Pre-Bloom Spike
Look for the fan-shaped leaves that signal an iris is preparing to bloom. These mature leaves grow from the rhizome and form a dense cluster. About 6-8 weeks before blooming, you'll notice a new, upright stem emerging from the center—this is your pre-bloom spike. It starts as a thin, pale green shoot that grows rapidly, reaching 12-18 inches tall before the first bud appears.
This is your first checkpoint: the spike should be sturdy and upright, not flopping or yellowing. If it appears weak, your iris may need more sunlight or balanced fertilizer. I always check for this spike in early spring—it's the first sign that summer blooms are on the way.
☀️ Step 2: Recognize Bud Formation and Heat Sensitivity
Once the spike reaches 6-8 inches tall, you'll see the first buds forming at the top. These are tight, oval-shaped swellings that feel firm to the touch. This stage is heat-triggered: buds typically form when daytime temperatures consistently reach 70-75°F for at least 3-5 days. If your region experiences late frosts, protect emerging buds with frost cloth until temperatures stabilize.
Here's the thing—iris buds are sensitive to extreme heat or cold during this phase. If temperatures drop below 50°F at night, buds may fail to open. I've seen buds swell then wither overnight if caught in a sudden cold snap. Watch for 2-3 buds per spike—this is normal, but if you see only one, your iris may be stressed.
🌿 Step 3: Monitor Bud Opening and Peak Bloom
The bud opening phase lasts 3-5 days and is the most visually dramatic. You'll notice the outer petals (falls) begin to separate first, revealing the inner petals (standards). At this stage, the bloom is most fragrant—iris flowers release their strongest scent in the early morning. The petals will gradually unfurl until fully open, typically reaching 4-6 inches wide.
Peak bloom occurs when all petals are fully extended and the center of the flower is clearly visible. This is when your iris is most vibrant and ready for cutting. I always harvest blooms at this stage—waiting too long causes petals to brown at the edges. Watch for dew on petals in the morning as a natural indicator of peak freshness.
⏰ Step 4: Observe Post-Bloom and Seed Pod Development
After 5-7 days of full bloom, petals begin to droop and fall away. This is when the seed pod starts forming at the base of the bloom. If you're growing iris for propagation, leave 1-2 seed pods per spike to develop—these will produce seeds in 6-8 weeks. Remove any additional pods to redirect the plant's energy into next year's blooms.
Don't cut back the entire spike until it turns completely brown and dies back. This ensures the rhizome stores enough nutrients for next season's growth. I always mark spent spikes with a small flag so I remember to leave them until they've fully matured. The rhizome will naturally shrink after blooming, which is normal—it's preparing for dormancy.
🪴 Step 5: Prepare for Dormancy and Next Year's Blooms
Once all foliage turns yellow and collapses, your iris enters dormancy. This typically occurs 6-8 weeks after peak bloom. During this time, reduce watering to once every 2-3 weeks unless your region experiences extreme heat. The rhizome needs this dry period to harden and store energy for next year's blooms.
Here's what to watch for: new fan leaves should begin emerging from the rhizome in late summer or early fall. This is your signal that the plant is preparing for another cycle. I always fertilize lightly at this stage with a low-nitrogen, high-phosphorus mix to encourage strong root and flower development. By next spring, you'll see those familiar pre-bloom spikes returning.
Tips & tricks for perfect iris bloom observation
Real talk: Understanding iris bloom stages isn't just about watching—it's about creating the right conditions. Here's what nobody tells you about getting the most dramatic transformations.
Temperature Tracking: The 70-75°F daytime range isn't just a suggestion—it's the sweet spot for bud formation. I use a simple outdoor thermometer to monitor temperatures during this critical 3-5 day window. If your region dips below 70°F, consider using a small greenhouse or cold frame to maintain consistent warmth. The buds are particularly vulnerable to nighttime drops below 50°F, which can cause them to wither overnight without warning.
Visual Cues for Each Stage: In Step 1, when you're checking for that pre-bloom spike, run your thumb along the stem—it should feel firm and resilient, not hollow or mushy. During the 3-5 day bud opening phase (Step 3), the outer petals will begin separating in the morning hours, often before 9 AM. This early opening is your best indicator of peak bloom timing. I've found that morning dew on fully open petals is the absolute best signal that it's time to harvest.
Seasonal Adjustments: For gardeners in cooler climates, extend the 6-8 week pre-bloom monitoring period by 2-3 weeks. The iris needs more time to acclimate to warmer temperatures. In hotter regions, you might see buds forming slightly earlier—watch for spikes reaching 6-8 inches by late April rather than May. This adjustment helps prevent the common mistake of assuming buds won't form when temperatures rise too quickly.
Propagation Strategy: When you're leaving 1-2 seed pods in Step 4, mark them with small colored flags tied to the spike. This visual reminder prevents accidental removal of your future plants. The pods will turn from green to brown in those 6-8 weeks, and you'll know exactly which ones to leave for propagation. I've had great success using toothpicks and colorful yarn for this purpose—it's both practical and garden-themed!
Pro Tips for Iris Bloom Stages
- Real talk: Understanding iris bloom stages isn't just about watching—it's about creating the right conditions. Here's...
- Temperature Tracking: The 70-75°F daytime range isn't just a suggestion—it's the sweet spot for bud formation. I use ...
- Visual Cues for Each Stage: In Step 1, when you're checking for that pre-bloom spike, run your thumb along the stem—i...
Frequently asked questions
Got questions about your iris blooms? You’re not alone! Here are answers to the most common queries about heat-triggered iris stages—from budding to full glory.
How do I know if my iris buds are ready to open?
Look for plump, firm buds with a slight green or purple tint at the base. If they feel slightly soft when gently squeezed (but not mushy), they’re nearing opening. Avoid touching them too much—irises are delicate!
Why did my iris buds drop off before blooming?
This usually happens due to extreme heat stress (above 90°F), overwatering, or pests like iris borers. Check for wilting leaves or holes in stems. If the weather’s scorching, provide afternoon shade and reduce watering.
Can I force iris blooms to open faster in hot weather?
While you can’t rush nature, light pruning of lower leaves (to improve airflow) and morning watering (to keep roots cool) may help. Avoid fertilizing during blooming—it can stress the plant. Patience pays off!
What’s the best time to cut iris blooms for arrangements?
Cut stems when 2-3 buds are open (about 50% bloom). Use sharp shears, and trim stems at a 45-degree angle underwater to extend vase life. Remove lower leaves to prevent bacteria buildup.
Will my iris rebloom next year if I cut the flowers?
Yes! Cutting spent blooms redirects energy to the rhizome, encouraging stronger growth. Just leave the leaves intact until they yellow naturally (usually late summer). Deadheading also prevents self-seeding, which can weaken future blooms.
Still stumped? Drop your iris blooming woes in the comments—we’ve got you covered!
Wrapping up and next steps
Understanding the iris bloom stages is like unlocking the secret to a vibrant garden—each phase, from bud to full bloom, reveals nature’s stunning precision! 🌸 Whether you’re a seasoned gardener or a curious beginner, recognizing these stages helps you nurture healthier, more resilient irises.
Now that you’re armed with insights on heat triggers, care tips, and troubleshooting, it’s time to put your knowledge into action.
Start by observing your irises closely—track their progress and adjust care as needed. Celebrate each bloom! And if you’re eager to dive deeper, experiment with different varieties or share your journey with fellow plant enthusiasts. Happy gardening! 🌱