
Blooming
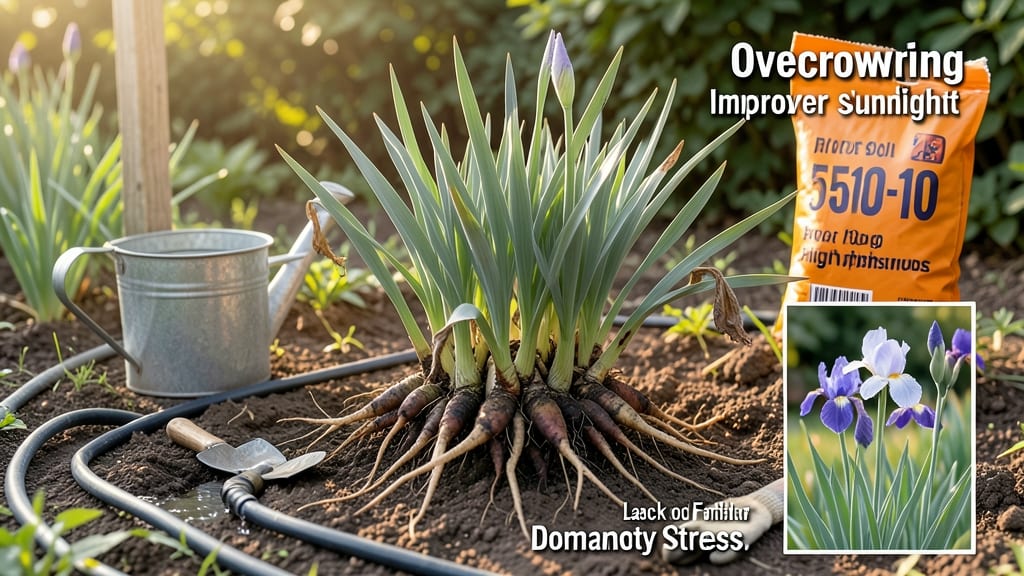
Why didn’t my irises bloom this year? The answer isn’t just about sunlight—though your clumps are begging for it. 🌞 I’ve seen stunning irises turn into leafy shadows when starved of light, and this year, we’re fixing that. The truth is, irises need at least 6 hours of direct sun daily, and poor soil or skipped dormancy can sabotage even the sunniest spot.
Most blooming failures come down to three things: light, soil, and timing. Overcrowded rhizomes steal energy from flowers, while nitrogen-heavy fertilizers produce leaves instead of blooms.
Even well-established clumps need dividing every 3-4 years to prevent this. The good news? These fixes are simple—just dig, divide, and adjust your care routine.
By next spring, you’ll see those classic sword-shaped leaves topped with vibrant purple, blue, or yellow blooms—just like the day you planted them. The key is acting now: prune spent blooms, test your soil, and give those rhizomes the sunlight they crave. Your irises will thank you.
Works for both in-ground clumps and container-grown irises. Let’s get those blooms back on track before next season!
The Real Culprits Behind Missed Blooms
If your irises are looking lovely but stubbornly refusing to bloom, don’t panic—there’s usually a clear reason behind it. Irises are hardy plants, but they’re also picky about their conditions.
Let’s break down the most common culprits that might be keeping your irises from putting on their floral show this year.
🌱 Insufficient Light Exposure
Irises thrive in full sun, meaning they need at least 6 to 8 hours of direct sunlight daily. If your irises are planted in a shady spot—whether from nearby trees, buildings, or even dense shrubs—they’ll focus their energy on growing leaves rather than blooming.
Why it happens: Irises are photoperiod-sensitive, meaning they rely on sunlight to trigger flowering. In low-light conditions, their metabolic energy shifts toward vegetative growth (more leaves, thicker rhizomes) instead of producing flower buds. Solution: Move your irises to a sunnier location, or thin out surrounding plants to improve light penetration.
🌡️ Temperature and Timing Mismatch
Irises bloom in early to mid-spring, typically after a period of winter dormancy. If your region experienced an unusually warm winter or late frost, it can throw off their natural blooming cycle.
Why it happens: Irises need a cooling period (vernalization) to break dormancy and initiate flowering. If temperatures stayed too warm during winter, the plant may not have received the chill signal it needs.
Additionally, late spring frosts can damage emerging buds before they open. Solution: Plant irises in a location protected from late frosts, or choose early-blooming varieties if your climate is unpredictable.
💧 Overwatering or Poor Drainage
Irises hate soggy feet. While they need consistent moisture, they’re highly sensitive to waterlogged soil, which can lead to root rot and stress, stalling blooms.
Why it happens: Irises are native to Mediterranean climates, where they experience dry summers and wet winters.
Overwatering—especially in containers or heavy clay soil—prevents oxygen from reaching the roots, causing them to suffocate. Solution: Ensure your irises are planted in well-draining soil (sandy loam is ideal) and avoid overhead watering. Let the soil dry out slightly between waterings.
🌿 Nutrient Imbalance or Over-Fertilizing
Too much of a good thing can backfire. Irises don’t need high-nitrogen fertilizers, which encourage leafy growth at the expense of flowers. Conversely, poor soil quality (lack of phosphorus or potassium) can also delay blooming.
Why it happens: Irises prefer low-fertility soil with a balance of nutrients. Excess nitrogen (common in lawn fertilizers) promotes lush foliage but suppresses flower production.
Meanwhile, a deficiency in phosphorus (essential for root and flower development) or potassium (critical for overall plant health) can weaken the plant’s ability to bloom. Solution: Use a low-nitrogen, phosphorus-rich fertilizer (like a 5-10-10 blend) in early spring, or amend soil with bone meal or compost.
🕰️ Age or Overcrowding of Rhizomes
Irises naturally decline in vigor after 3–5 years, and overcrowded rhizomes (the thick, fleshy roots) compete for resources, leading to fewer—or no—blooms.
Why it happens: As irises mature, their rhizomes become overgrown and congested, leaving less energy for flower production.
Additionally, small or weak rhizomes (under 2 inches in diameter) may not have enough stored energy to support blooms. Solution: Divide and replant your irises every 3–4 years in early fall or late winter. Discard small or diseased rhizomes and replant the healthiest ones in well-draining soil.
🐞 Pests or Diseases Stressing the Plant
Irises can fall victim to iris borers, aphids, or fungal diseases like leaf spot, which weaken the plant and reduce flowering.
Why it happens: Iris borers (larvae that tunnel into rhizomes) and aphids (which suck sap from leaves) drain the plant’s energy, leaving little for blooms.
Fungal infections, often worsened by high humidity or poor air circulation, can also stunt growth. Solution: Inspect rhizomes for borers before planting, use neem oil or insecticidal soap for pests, and ensure good airflow around plants to prevent fungal issues.
Fixing Your Irises Bloom Struggles
No blooms this year? Don’t worry—irises are tough, and with the right tweaks, they’ll reward you with stunning flowers next season. Below, we’ll map the most common causes to practical fixes, plus prevention tips to keep your irises thriving.
---
Problem: Irises bloom best when they have space to grow. Over time, rhizomes (those thick, fleshy stems) crowd out, stealing nutrients and energy from flowering.
How to Fix It: 🔥 When to do it: Late summer or early fall (after blooming). 🍳 Dig up clumps—gently remove the rhizomes from the soil. 👨🍳 Divide the rhizomes: Separate them into sections, ensuring each has at least one healthy fan of leaves and a thick, firm rhizome (discard soft, mushy ones). 🥘 Replant immediately: Space rhizomes 12–24 inches apart (depending on variety) with half exposed above soil (they need sunlight to dry). ⏰ Water lightly for the first week to help them establish.
Prevention Tip: ✨ Divide every 3–5 years to keep plants vigorous. If you’re lazy (we get it!), at least trim dead leaves in early spring to redirect energy.
---
Problem: Irises hate soggy roots (rot risk!) but also struggle in drought. Poor drainage or inconsistent watering can stall blooms.
How to Fix It: 🔥 Check your soil: Stick your finger in—if it’s bone-dry 2+ inches down, water deeply. 🍳 Improve drainage: Amend heavy clay soil with compost or coarse sand (irises despise sitting in wet feet). 👨🍳 Water deeply but infrequently: Aim for 1–1.5 inches per week (including rain). Let the top inch of soil dry between waterings. 🥘 Mulch lightly: Use 2–3 inches of gravel or bark to retain moisture without suffocating roots.
Prevention Tip: 💡 Install a drip irrigation system on a timer to avoid over- or under-watering. Irises are drought-tolerant once established—don’t baby them!
---
Problem: Irises need full sun (6+ hours daily) to bloom. Too much shade (from trees or buildings) weakens them.
How to Fix It: 🔥 Assess sunlight: If your irises are in partial shade, relocate them to a sunnier spot ASAP. 🍳 If moving isn’t an option: Prune nearby trees or shrubs to increase light exposure. 👨🍳 Choose the right varieties: Some irises (like Iris sibirica) tolerate partial shade, while others (like Iris germanica) demand full sun.
Prevention Tip: 🌡️ Plant irises in the spring when they can establish roots before summer heat. Avoid fall planting in hot climates—roots need time to settle.
---
Problem: Irises need well-draining, slightly alkaline soil (pH 6.5–7.5). Compacted or nutrient-poor soil starves them.
How to Fix It: 🔥 Test your soil: A DIY pH test kit (or send a sample to your local extension office) tells you if it’s too acidic. 🍳 Amend acidic soil: Mix in crushed limestone to raise pH gradually. 👨🍳 Fertilize lightly: Use a low-nitrogen, high-phosphorus fertilizer (like 5-10-10) in early spring to encourage blooms. 🥘 Add organic matter: Work in compost or well-rotted manure to improve drainage and fertility.
Prevention Tip: ⚠️ Avoid high-nitrogen fertilizers (like lawn food)—they promote leafy growth but fewer blooms. Think “blooms, not lawn.”
---
Problem: Irises bloom based on temperature cues. If they’re out of sync with your climate, buds may abort or fail to open.
How to Fix It: 🔥 Know your iris type: Bearded irises bloom in early to mid-spring; Siberian or Japanese irises bloom late spring to summer. 🍳 Adjust planting time: If blooms are too early, plant rhizomes later in fall (but at least 6 weeks before frost). 👨🍳 Protect from late frosts: Use frost cloth if night temps dip below 28°F while buds are forming. 🥘 Deadhead spent blooms: Cut old flower stalks (but leave leaves!) to redirect energy for next year’s blooms.
Prevention Tip: 🎯 Plant in a sheltered spot (like near a south-facing wall) to extend the growing season and prevent frost damage.
--- Problem: Iris borers (larvae that tunnel into rhizomes) or fungal diseases (like leaf spot) can weaken plants.
How to Fix It: 🔥 Inspect rhizomes: Look for holes, sawdust-like frass (borer poop), or soft rot. 🍳 Treat borers: Spray neem oil in early spring or apply diatomaceous earth around the base. 👨🍳 Fight fungus: Remove infected leaves, then spray with copper fungicide or baking soda mix (1 tbsp baking soda + 1 quart water + a drop of dish soap). 🥘 Replace severely damaged rhizomes: If borers have ruined them, discard and replant healthy divisions.
Prevention Tip: 🔥 Plant irises in well-draining soil—borers love soggy conditions. Rotate planting spots every few years to break pest cycles.
--- | Issue | Fix It Now | Prevent Next Year | |---------------------|----------------------------------------|-------------------------------------| | Overcrowding | Divide rhizomes, replant spaced out | Thin every 3–5 years | | Poor drainage | Amend soil, improve watering | Mulch with gravel, avoid overwatering | | Shade | Move to sunnier spot or prune trees | Plant in full sun from the start | | Nutrient-poor soil | Test pH, fertilize, add compost | Use balanced fertilizer in spring | | Pests/disease | Spray neem oil, remove infected parts | Rotate planting spots, keep dry |
Frequently asked questions
My irises had plenty of leaves but no blooms—what could be wrong?
This is the classic sign of overcrowding or too much nitrogen. Irises need space to grow—when rhizomes get congested, they focus on leaves instead of flowers. Also, high-nitrogen fertilizers (like lawn food) encourage leafy growth at the expense of blooms. Try dividing your clumps in late summer and switch to a low-nitrogen, phosphorus-rich fertilizer next spring.
Can I fix my irises' blooming issues without digging them up?
Yes! Start with light and nutrients. Move your irises to a sunnier spot (6+ hours of direct sun) and avoid fertilizers with high nitrogen. Instead, use a balanced bloom booster (like 5-10-10) in early spring. If pests are the issue, spray with neem oil—it’s safe and effective against iris borers and aphids. For immediate results, deadhead spent blooms to redirect energy to next year’s flowers.
Why did my irises bloom late this year?
Late blooming usually means your irises didn’t get enough winter chill (vernalization). If your area had an unusually warm winter, the plants may not have received the cold signal they need to trigger blooms. Also, late spring frosts can damage emerging buds. Try planting in a sheltered spot next year or choose early-blooming varieties like Iris germanica.
How do I know if my irises need dividing?
Divide your irises if you see fewer than 3–5 fans of leaves per rhizome or if the clump looks congested. Healthy rhizomes should be thick and firm (about the size of a bar of soap), while overcrowded ones will have thin, weak leaves and fewer blooms. The best time to divide is late summer or early fall—just dig up the clump, separate the rhizomes, and replant with half exposed above soil.
Will mulching help my irises bloom better?
Mulching can help, but use it wisely! Irises hate soggy roots, so avoid thick organic mulch (like wood chips) that retains too much moisture. Instead, use a 2–3 inch layer of gravel or coarse sand to improve drainage and keep weeds down. This mimics their natural Mediterranean habitat where they experience dry summers. Just keep the mulch 2–3 inches away from the rhizomes to prevent rot.